By Jasmine Cueva
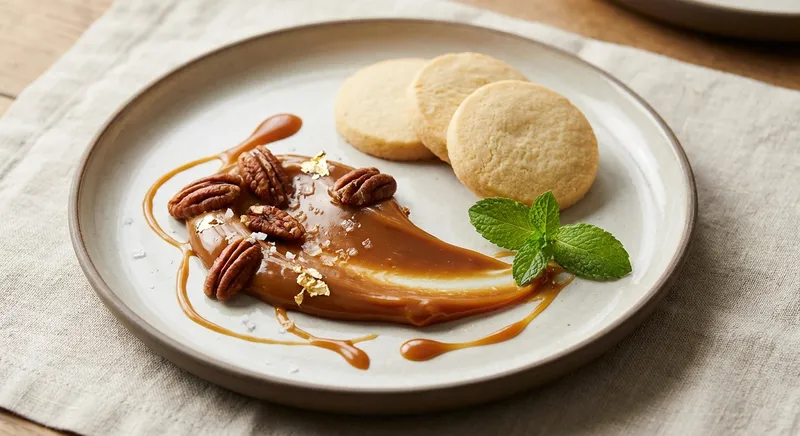
Silky, deeply caramelized dulce de leche made from just milk and sugar — a luxuriously sweet, toffee-like spread with honeyed milk notes and a velvety texture. Slow reduction concentrates the milk’s natural sugars and proteins to produce complex caramel and toasted flavors; use it as a spoonable dessert, a topping for ice cream, or folded into pastries.
Measure and prep. Measure 1,000 ml whole milk and 300 g granulated sugar. Having accurate proportions ensures the final sweetness and viscosity: too little sugar and the mixture won’t caramelize evenly; too much increases risk of crystallization.
Choose your pan and tools. Use a heavy-bottomed, wide stainless steel or enameled pot (not thin aluminum) and a heatproof silicone spatula or whisk. A wide pot increases surface area for evaporation so the milk reduces faster and more evenly; a heavy base prevents hot spots and scorching.
Combine milk, sugar and salt in the pot. Add the milk, sugar and a small pinch (1/8 tsp) of fine sea salt to the pot and whisk briefly to dissolve the sugar. Dissolving the sugar before heat prevents large undissolved crystals that can seed gritty texture later.
Bring to a gentle simmer over medium heat. Heat until the mixture just reaches a simmer (small bubbles around the edges). Do not boil vigorously — a rolling boil will cause rapid, uneven evaporation and increase the chance of burning and curdling. Medium heat gives control.
Reduce heat and maintain a low, steady simmer. Once simmering, immediately lower to low heat so the surface shows steady tiny bubbles. You want gentle evaporation: this encourages Maillard reactions (browning of milk proteins) and slow caramelization of the sugars without scorching.
Stir frequently for the first 15–20 minutes. In the early stage, when the milk is still mostly liquid, stir every 2–3 minutes with a silicone spatula, scraping the bottom and sides. This prevents a milk-protein film and the formation of burned bits that would flavor the whole batch.
Shift to occasional stirring as the mixture thickens. After 20–30 minutes the milk will begin to thicken and darken. Stir every 5–10 minutes, more often if you see browning on the bottom. As water evaporates, concentrations rise — brief heavy stirring also evens temperature and prevents localized scorching.
Reduce to a glossy caramel color. Continue simmering and stirring periodically until the mixture becomes a rich, golden-caramel color and thickens to a spoon-coating consistency — about 2 to 2½ hours total. The color signals complex flavor development (Maillard + caramelization).
Check the texture. To test, dip a spoon and let a small amount cool on the spoon: it should coat the back of the spoon and drip slowly. Remember the dulce de leche will thicken more as it cools, so stop when slightly looser than your final target.
Strain for silkiness (optional but recommended). Pour the hot dulce de leche through a fine mesh sieve into a bowl to remove any tiny particulates or toasted bits. Straining gives a restaurant-smooth texture.
Cool and store. Let cool to room temperature, then transfer to a clean jar. It will thicken as it cools. Refrigerate up to 2 weeks. Bring to room temp or gently warm before using to restore spreadable consistency.
Serving suggestions. Use as a spoonable dessert, swirl into yogurt, spread on toast, fold into buttercream, or serve alongside fresh fruit and shortbread for contrast in texture and acidity.
302
Calories
6g
Protein
58g
Carbs
6g
Fat
0g
Fiber
How did this recipe turn out? Let others know!
to rate this recipe
By Jasmine Cueva
Silky, deeply caramelized dulce de leche made from just milk and sugar — a luxuriously sweet, toffee-like spread with honeyed milk notes and a velvety texture. Slow reduction concentrates the milk’s natural sugars and proteins to produce complex caramel and toasted flavors; use it as a spoonable dessert, a topping for ice cream, or folded into pastries.
Measure and prep. Measure 1,000 ml whole milk and 300 g granulated sugar. Having accurate proportions ensures the final sweetness and viscosity: too little sugar and the mixture won’t caramelize evenly; too much increases risk of crystallization.
Choose your pan and tools. Use a heavy-bottomed, wide stainless steel or enameled pot (not thin aluminum) and a heatproof silicone spatula or whisk. A wide pot increases surface area for evaporation so the milk reduces faster and more evenly; a heavy base prevents hot spots and scorching.
Combine milk, sugar and salt in the pot. Add the milk, sugar and a small pinch (1/8 tsp) of fine sea salt to the pot and whisk briefly to dissolve the sugar. Dissolving the sugar before heat prevents large undissolved crystals that can seed gritty texture later.
Bring to a gentle simmer over medium heat. Heat until the mixture just reaches a simmer (small bubbles around the edges). Do not boil vigorously — a rolling boil will cause rapid, uneven evaporation and increase the chance of burning and curdling. Medium heat gives control.
Reduce heat and maintain a low, steady simmer. Once simmering, immediately lower to low heat so the surface shows steady tiny bubbles. You want gentle evaporation: this encourages Maillard reactions (browning of milk proteins) and slow caramelization of the sugars without scorching.
Stir frequently for the first 15–20 minutes. In the early stage, when the milk is still mostly liquid, stir every 2–3 minutes with a silicone spatula, scraping the bottom and sides. This prevents a milk-protein film and the formation of burned bits that would flavor the whole batch.
Shift to occasional stirring as the mixture thickens. After 20–30 minutes the milk will begin to thicken and darken. Stir every 5–10 minutes, more often if you see browning on the bottom. As water evaporates, concentrations rise — brief heavy stirring also evens temperature and prevents localized scorching.
Reduce to a glossy caramel color. Continue simmering and stirring periodically until the mixture becomes a rich, golden-caramel color and thickens to a spoon-coating consistency — about 2 to 2½ hours total. The color signals complex flavor development (Maillard + caramelization).
Check the texture. To test, dip a spoon and let a small amount cool on the spoon: it should coat the back of the spoon and drip slowly. Remember the dulce de leche will thicken more as it cools, so stop when slightly looser than your final target.
Strain for silkiness (optional but recommended). Pour the hot dulce de leche through a fine mesh sieve into a bowl to remove any tiny particulates or toasted bits. Straining gives a restaurant-smooth texture.
Cool and store. Let cool to room temperature, then transfer to a clean jar. It will thicken as it cools. Refrigerate up to 2 weeks. Bring to room temp or gently warm before using to restore spreadable consistency.
Serving suggestions. Use as a spoonable dessert, swirl into yogurt, spread on toast, fold into buttercream, or serve alongside fresh fruit and shortbread for contrast in texture and acidity.
302
Calories
6g
Protein
58g
Carbs
6g
Fat
0g
Fiber
Your Rating:
