By Jennifer Fondren (Jen)
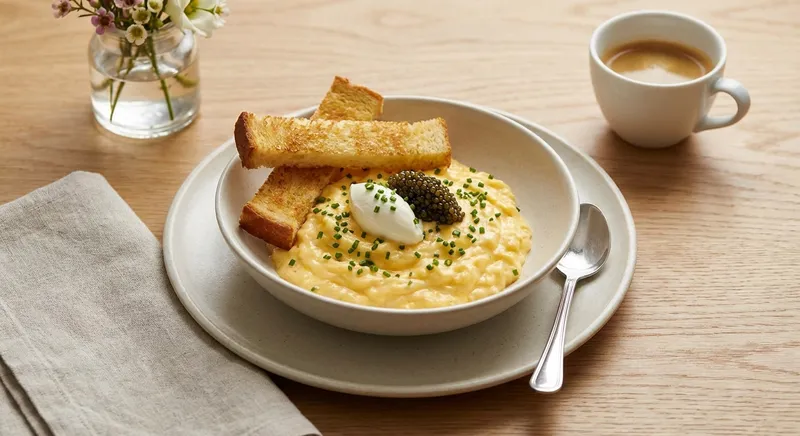
Ultra-silky, custardy scrambled eggs cooked gently in butter and finished with a splash of milk for a luxurious mouthfeel. The technique—low-and-slow stirring and an off-heat finish—creates a creamy texture with glossy curds that feel indulgent but light; simple ingredients highlight pure egg flavor with a buttery, velvety finish.
Crack the eggs into a medium mixing bowl. Add the milk and 1/4 teaspoon of the salt. Whisk until the mixture is homogeneous and slightly aerated — about 20–30 seconds. WHY: Thorough whisking breaks up the whites and yolks evenly and incorporates a little air for softness; the milk loosens the curds and contributes to a silkier finished texture.
Place a nonstick or well-seasoned stainless-steel skillet (8–10 inch) over low heat. Add 1 tablespoon of the butter and let it melt slowly until it foams and the foam subsides. WHY: Starting on low prevents the butter from browning quickly; the foam indicates water evaporating and helps the butter coat the pan for even cooking.
Pour the whisked eggs into the warm skillet. Immediately begin stirring gently and continuously with a silicone spatula, making slow figure-eight motions and scraping the bottom of the pan. WHY: Continuous gentle stirring creates small, tender curds and prevents any part of the egg from overcooking into dry, rubbery pieces. Low heat ensures gradual coagulation for a creamy texture.
When the curds begin to form but the eggs are still very wet (about 2–3 minutes), add the remaining 1 tablespoon butter in small knobs, stirring it in so it melts into the eggs. WHY: Adding butter in pieces enriches the eggs and ensures a glossy finish; the fat helps carry flavor and keeps the curds creamy.
Continue stirring and watch the eggs — as soon as they are mostly set but still slightly runny (a loose custard), remove the pan from the heat (about 1–2 minutes more). Immediately continue stirring off-heat for 20–30 seconds to let residual heat finish the cooking. WHY: Carryover cooking will bring the eggs to the perfect doneness without passing the point of tenderness. Stopping on heat prevents overcooking and yields a silky texture.
Season with the remaining 1/4 teaspoon salt and freshly ground black pepper to taste. Transfer the eggs to warmed plates and garnish with chopped chives if using. Serve immediately. WHY: Finishing with seasoning ensures salt doesn’t draw out moisture during cooking; plating on warm dishes keeps the eggs at the right temperature longer.
Optional: For a creamier, richer version, fold in 1 tablespoon of cold butter or a splash (1 tsp) of cold milk off the heat right before serving. WHY: A small cold fat addition emulsifies into the warm curds, giving extra silk and shine without overcooking.
330
Calories
20g
Protein
2g
Carbs
27g
Fat
0g
Fiber
How did this recipe turn out? Let others know!
to rate this recipe
By Jennifer Fondren (Jen)
Ultra-silky, custardy scrambled eggs cooked gently in butter and finished with a splash of milk for a luxurious mouthfeel. The technique—low-and-slow stirring and an off-heat finish—creates a creamy texture with glossy curds that feel indulgent but light; simple ingredients highlight pure egg flavor with a buttery, velvety finish.
Crack the eggs into a medium mixing bowl. Add the milk and 1/4 teaspoon of the salt. Whisk until the mixture is homogeneous and slightly aerated — about 20–30 seconds. WHY: Thorough whisking breaks up the whites and yolks evenly and incorporates a little air for softness; the milk loosens the curds and contributes to a silkier finished texture.
Place a nonstick or well-seasoned stainless-steel skillet (8–10 inch) over low heat. Add 1 tablespoon of the butter and let it melt slowly until it foams and the foam subsides. WHY: Starting on low prevents the butter from browning quickly; the foam indicates water evaporating and helps the butter coat the pan for even cooking.
Pour the whisked eggs into the warm skillet. Immediately begin stirring gently and continuously with a silicone spatula, making slow figure-eight motions and scraping the bottom of the pan. WHY: Continuous gentle stirring creates small, tender curds and prevents any part of the egg from overcooking into dry, rubbery pieces. Low heat ensures gradual coagulation for a creamy texture.
When the curds begin to form but the eggs are still very wet (about 2–3 minutes), add the remaining 1 tablespoon butter in small knobs, stirring it in so it melts into the eggs. WHY: Adding butter in pieces enriches the eggs and ensures a glossy finish; the fat helps carry flavor and keeps the curds creamy.
Continue stirring and watch the eggs — as soon as they are mostly set but still slightly runny (a loose custard), remove the pan from the heat (about 1–2 minutes more). Immediately continue stirring off-heat for 20–30 seconds to let residual heat finish the cooking. WHY: Carryover cooking will bring the eggs to the perfect doneness without passing the point of tenderness. Stopping on heat prevents overcooking and yields a silky texture.
Season with the remaining 1/4 teaspoon salt and freshly ground black pepper to taste. Transfer the eggs to warmed plates and garnish with chopped chives if using. Serve immediately. WHY: Finishing with seasoning ensures salt doesn’t draw out moisture during cooking; plating on warm dishes keeps the eggs at the right temperature longer.
Optional: For a creamier, richer version, fold in 1 tablespoon of cold butter or a splash (1 tsp) of cold milk off the heat right before serving. WHY: A small cold fat addition emulsifies into the warm curds, giving extra silk and shine without overcooking.
330
Calories
20g
Protein
2g
Carbs
27g
Fat
0g
Fiber
Your Rating:
