By Mary Cross
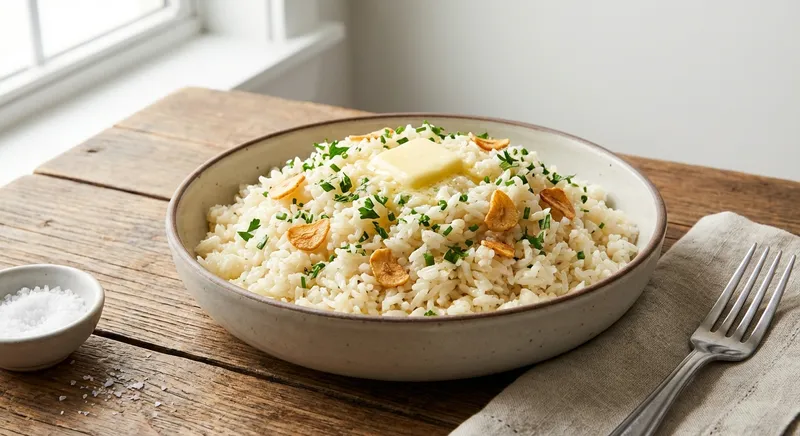
A glossy, restaurant-quality white rice cooked in the Instant Pot, flavored with sautéed onion, fragrant garlic, and rich butter. The technique—rinsing the rice, toasting the grains briefly in butter, then pressure-cooking with a precise 1:1 liquid ratio—yields separate, tender grains with a silky mouthfeel and gentle savory depth.
Rinse the rice: Put the 2 cups of rice in a fine-mesh sieve or bowl and rinse under cold running water, agitating with your hand until the water runs mostly clear (about 30–60 seconds). Why: Rinsing removes surface starch that makes rice gummy; this step helps achieve distinct, separate grains.
Drain and set aside: Let the rinsed rice drain in the sieve while you prep the aromatics. Why: Removing excess surface water prevents you from accidentally changing the pot liquid ratio and keeps the saute stage effective.
Sauté aromatics in the Instant Pot on 'Sauté' (Normal) for depth: Add the 2 tbsp unsalted butter to the Instant Pot and let it melt and foam (about 30 seconds). Add the finely diced small onion and a pinch of salt; cook, stirring frequently, until the onion is translucent and just starting to color, about 4 minutes. Add the minced garlic and cook another 30–45 seconds until fragrant. Why: Sautéing builds flavor—softening the onion and lightly toasting the garlic brings sweet, savory notes into the rice.
Toast the rice briefly: Add the drained rice to the pot and stir to coat every grain with butter and aromatics, cooking for 60–90 seconds. Why: Toasting the rice seals the surface slightly and coats it in fat, which improves texture (more separate grains) and deepens flavor—this is the classic pilaf step adapted for pressure-cooking.
Add water and season: Pour in 2 cups room-temperature water, add 1.5 tsp kosher salt, and 1/2 tsp freshly ground black pepper. Use a silicone spatula or wooden spoon to scrape any browned bits from the bottom (deglaze). Why: The 1:1 rice-to-water ratio is the reliable Instant Pot method for white long-grain rice; deglazing prevents the 'burn' warning and ensures even cooking.
Set to pressure-cook: Secure the lid and set the valve to SEALING. Cancel 'Sauté' and select 'Pressure Cook' (High) for 4 minutes. Why: High-pressure short-cook combined with the sealed environment cooks the rice quickly and evenly without needing extra water.
Let the pressure release naturally: After the 4-minute cook finishes, allow a 10-minute natural pressure release (do not immediately quick-release). After 10 minutes, carefully switch the valve to VENTING to release any remaining pressure, then open the lid. Why: Natural release allows the rice to finish steaming gently and settle; a quick release can forcefully disturb the grains and make them uneven or sticky.
Fluff and finish: With a fork or rice paddle, gently fluff the rice to separate grains. Taste and adjust seasoning with a pinch more salt if needed. Stir in chopped parsley if using. Why: Fluffing separates grains without crushing them; finishing with herbs adds brightness and a restaurant polish.
Serve immediately: Spoon onto warmed plates or a warmed serving bowl and serve as a silky, savory bed for proteins or vegetables. Why: Rice is best enjoyed hot and just-fluffed for the best texture and mouthfeel.
399
Calories
7g
Protein
77g
Carbs
6g
Fat
2g
Fiber
How did this recipe turn out? Let others know!
to rate this recipe
By Mary Cross
A glossy, restaurant-quality white rice cooked in the Instant Pot, flavored with sautéed onion, fragrant garlic, and rich butter. The technique—rinsing the rice, toasting the grains briefly in butter, then pressure-cooking with a precise 1:1 liquid ratio—yields separate, tender grains with a silky mouthfeel and gentle savory depth.
Rinse the rice: Put the 2 cups of rice in a fine-mesh sieve or bowl and rinse under cold running water, agitating with your hand until the water runs mostly clear (about 30–60 seconds). Why: Rinsing removes surface starch that makes rice gummy; this step helps achieve distinct, separate grains.
Drain and set aside: Let the rinsed rice drain in the sieve while you prep the aromatics. Why: Removing excess surface water prevents you from accidentally changing the pot liquid ratio and keeps the saute stage effective.
Sauté aromatics in the Instant Pot on 'Sauté' (Normal) for depth: Add the 2 tbsp unsalted butter to the Instant Pot and let it melt and foam (about 30 seconds). Add the finely diced small onion and a pinch of salt; cook, stirring frequently, until the onion is translucent and just starting to color, about 4 minutes. Add the minced garlic and cook another 30–45 seconds until fragrant. Why: Sautéing builds flavor—softening the onion and lightly toasting the garlic brings sweet, savory notes into the rice.
Toast the rice briefly: Add the drained rice to the pot and stir to coat every grain with butter and aromatics, cooking for 60–90 seconds. Why: Toasting the rice seals the surface slightly and coats it in fat, which improves texture (more separate grains) and deepens flavor—this is the classic pilaf step adapted for pressure-cooking.
Add water and season: Pour in 2 cups room-temperature water, add 1.5 tsp kosher salt, and 1/2 tsp freshly ground black pepper. Use a silicone spatula or wooden spoon to scrape any browned bits from the bottom (deglaze). Why: The 1:1 rice-to-water ratio is the reliable Instant Pot method for white long-grain rice; deglazing prevents the 'burn' warning and ensures even cooking.
Set to pressure-cook: Secure the lid and set the valve to SEALING. Cancel 'Sauté' and select 'Pressure Cook' (High) for 4 minutes. Why: High-pressure short-cook combined with the sealed environment cooks the rice quickly and evenly without needing extra water.
Let the pressure release naturally: After the 4-minute cook finishes, allow a 10-minute natural pressure release (do not immediately quick-release). After 10 minutes, carefully switch the valve to VENTING to release any remaining pressure, then open the lid. Why: Natural release allows the rice to finish steaming gently and settle; a quick release can forcefully disturb the grains and make them uneven or sticky.
Fluff and finish: With a fork or rice paddle, gently fluff the rice to separate grains. Taste and adjust seasoning with a pinch more salt if needed. Stir in chopped parsley if using. Why: Fluffing separates grains without crushing them; finishing with herbs adds brightness and a restaurant polish.
Serve immediately: Spoon onto warmed plates or a warmed serving bowl and serve as a silky, savory bed for proteins or vegetables. Why: Rice is best enjoyed hot and just-fluffed for the best texture and mouthfeel.
399
Calories
7g
Protein
77g
Carbs
6g
Fat
2g
Fiber
Your Rating:
