Chewy, toffee-tinted cookies with a glossy fudgy center thanks to browned butter and oil—simple steps, bold flavor, and bakery-worthy texture at home today.
Chewy, toffee-tinted cookies with a glossy fudgy center thanks to browned butter and oil—simple steps, bold flavor, and bakery-worthy texture at home today.
Ready to cook?
Get the complete ingredient list, step-by-step instructions, and nutritional info
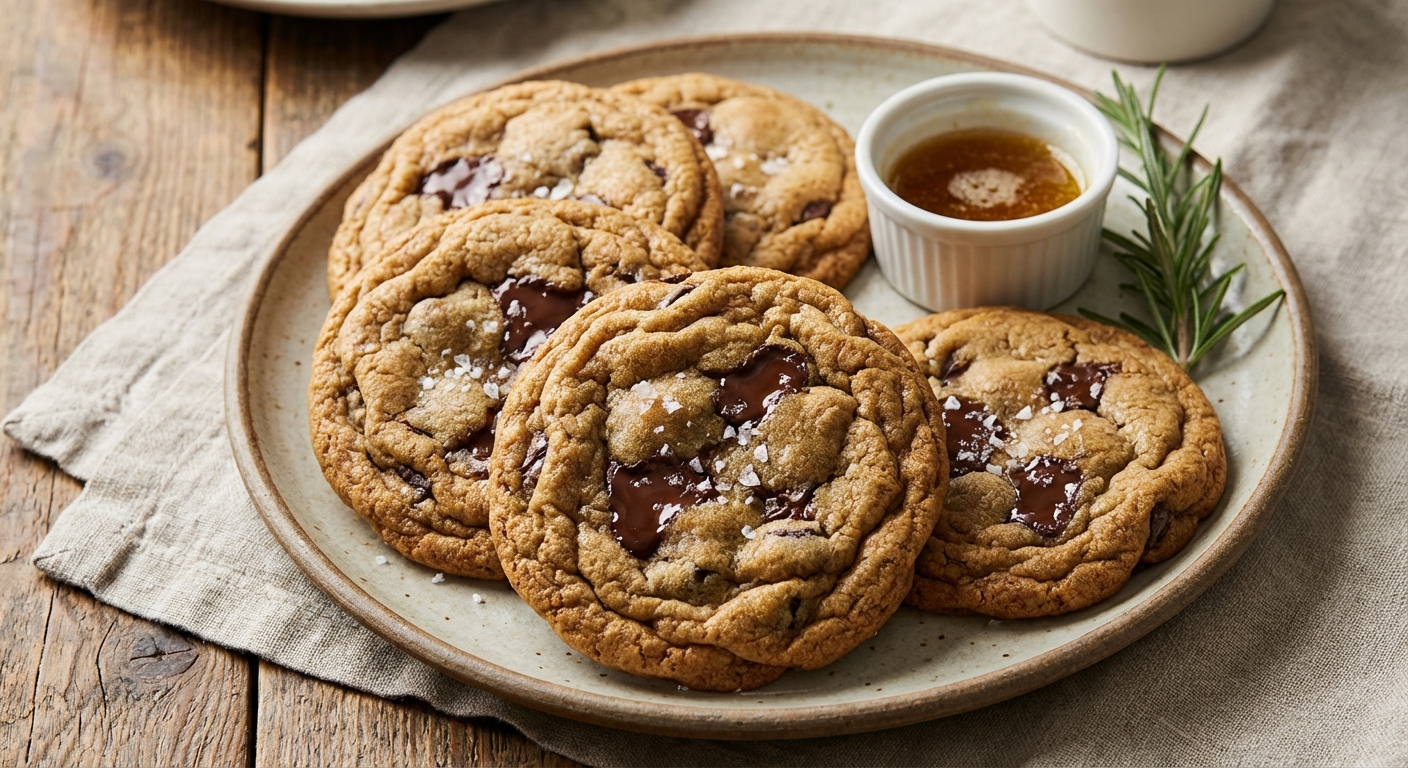
View Recipe →There are cookies, and then there are cookies with a little bit of cinema-grade drama. This Browned Butter & Oil Chewy Chocolate Chip Cookies recipe hits that sweet spot where comfort meets technique, where a simple kitchen ritual—browning butter—transforms everyday ingredients into something that tastes like it came from a bakery, but with the warmth of home. I’ve staged these cookies for late-night cravings, celebratory gatherings, and a quick, no-fuss weekend bake. The magic lies in a few precise choices: browning the butter to coax toffee and nutty notes, whisking in a neutral oil to preserve a chewy center, and then folding in chips like secret little pockets of molten joy. The result? Edges that caramelize into a gentle crunch, centers that stay fudgy and soft, and an aroma that turns even the most stoic dinner guests into cookie enthusiasts. If you’re scrolling for a recipe that delivers a chef-level flavor without needing a pastry chef’s toolkit, you’ve found it.
As with any great bake, the journey is half the joy. I test baked sheets on two pans, rotate halfway, and rest the cookies on a rack to meet that perfect balance of crispness and tenderness. The dough rests (optional but recommended) for 30–60 minutes; this helps the fat firm up, the flavors deepen, and the dough become easier to portion. If you’re the type who loves a little crunch and a little chew in every bite, you’re in for a treat. And yes, this recipe belongs in the Delicious homemade category—because these cookies are exactly the kind of thing you’ll want to share with friends and family, warm from the oven and straight onto a cooling rack.
Every ingredient here serves a purpose beyond just “taste good.” Here’s a closer look at why these components matter, with quick notes on how they contribute to the final texture and flavor. If you’re curious about each ingredient, you can click through to learn more at the links below.
Tip: If you’re planning ahead, you can refrigerate the mixed dough for 30–60 minutes (or up to 24 hours for deeper flavor). The chill firms the fats, giving you better control over spread and texture as the cookies bake.
These cookies shine best warm, with the chocolate still molten and the centers holding a bit of fudgy resistance. Serve them with a glass of cold milk, a hot cup of coffee, or a scoop of vanilla ice cream on the side for a simple dessert that feels indulgent without requiring a lot of fuss. If you’re hosting a cookie platter, pair these with a crisp oatmeal cookie and a darker chocolate specimen to give guests a range of textures and flavor notes to explore.
Storage is easy: keep baked cookies in an airtight container at room temperature for up to 3 days (if they last that long). For longer storage, freeze baked cookies in a single layer on a sheet, then transfer to a freezer-safe bag for up to 2–3 months. Reheat briefly in a 150–160°C (300-325°F) oven to refresh the texture.
If you’re sharing, these cookies travel well—wrap individually in parchment or place in a tin with a sheet of parchment between layers to keep them from sticking. It’s a small touch, but it adds a sense of care that your guests will notice.
As a reminder, these cookies sit happily in the Delicious homemade category, a collection I’m growing with love for everyday bakers who want tomorrow’s favorite treat today.
For a little finishing touch, consider pairing these cookies with a drizzle of melted chocolate on top or a dusting of flaky sea salt just before serving. The salt brightens the flavors and makes the chocolate pop in each bite.
Feeling inspired to experiment? If you’re game to customize, you can swap in dairy-free butter or almond milk with careful adjustments to keep the dough hydrated, or try a 1:1 gluten-free flour blend. The core technique—brown butter, ice-cold fat, and careful folding—still applies and rewards you with the same crave-worthy chew.
If you try this recipe, I’d love to hear how your cookies turn out. Every oven is a little different, and a small adjustment—whether in bake time, chill duration, or chip distribution—can yield a version that’s uniquely yours. And if you’re excited to keep cooking, you’re in the right place. I hope you’ll explore more of my recipes and inspiration, and consider venturing into your own kitchen to create something delicious today at this creative hub.
Discover similar recipes you'll love