Master the art of homemade beef kielbasa—from grinding to grilling—with smoky paprika, garlic, and a silky binding. Flavorful, satisfying, unforgettable. Yum
Master the art of homemade beef kielbasa—from grinding to grilling—with smoky paprika, garlic, and a silky binding. Flavorful, satisfying, unforgettable. Yum
Ready to cook?
Get the complete ingredient list, step-by-step instructions, and nutritional info
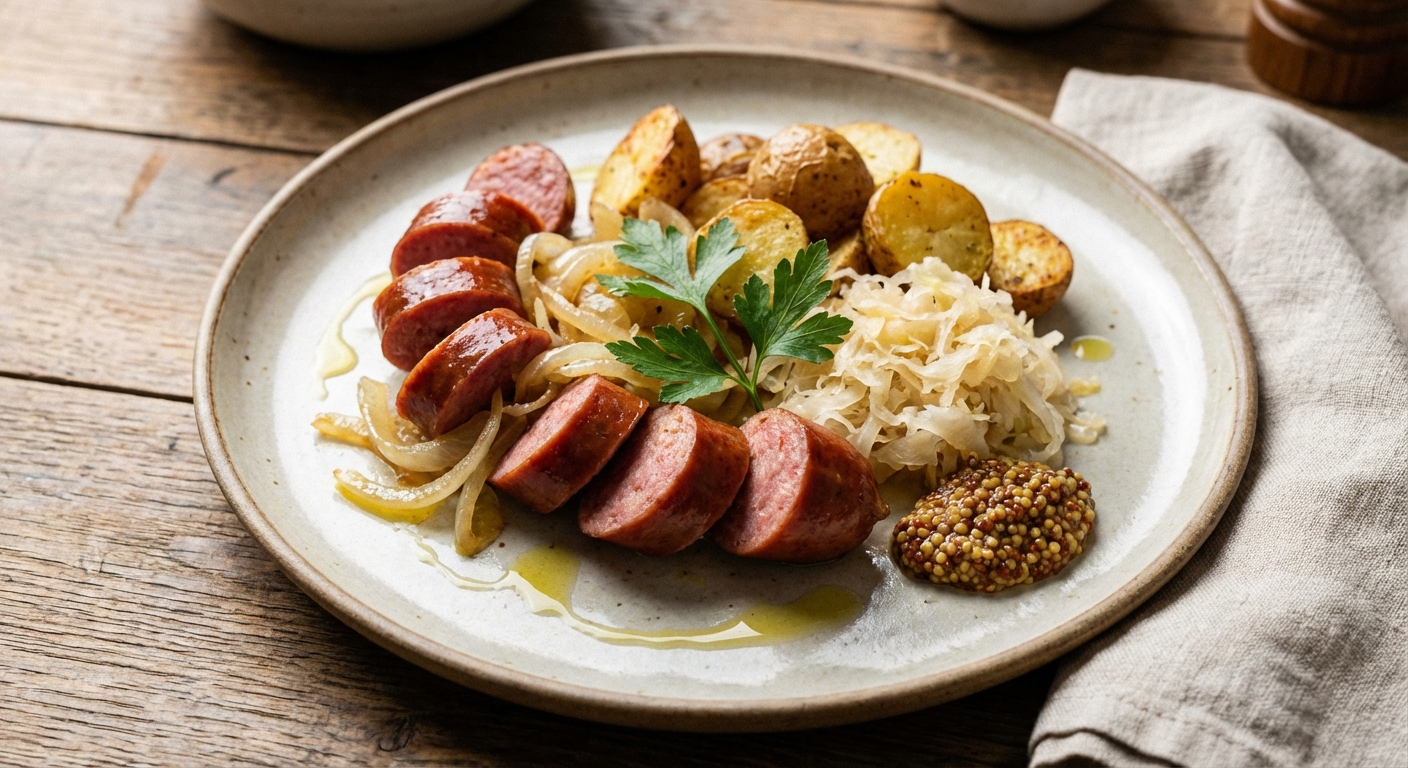
View Recipe →There’s something deeply satisfying about turning a simple collection of ingredients into a toothsome, smoky sausage you can proudly boast as “homemade.” When I first rolled up my sleeves to craft Homemade Beef Kielbasa, I was chasing that perfect balance of beefy richness, a gentle kiss of smoke, and a touch of sweetness that won’t overwhelm the palate. This recipe, clocking in at about 2 hours and 30 minutes, walks you through a patient process—grinding, seasoning, binding, stuffing, and finally grilling or pan-searing—to deliver sausages that feel like they’ve kissed a grill’s edge and come back with confidence. It’s the kind of recipe that invites conversation at the table, pairs with a cold beer or a crisp apple cider, and makes you feel like you’ve unlocked a small culinary superpower in your own kitchen. If you’re curious where this recipe sits in the broader food world, you’ll find it in the Delicious homemade category, a corner of the blog where comfort foods and classic techniques live side by side. And if you’re new to the sausage game, remember: good things come to those who patiently season, chill, and stuff with care.
Sausage making rewards the curious cook who respects the physics of meat: fat, protein, and ice-cold handling come together to form a binding emulsion that holds the bite while delivering juicy texture. Here’s a closer look at the star players and why they matter, with links to the essential ingredient pages so you can learn more or shop with confidence:
From a flavor perspective, this ensemble is designed to be bold yet balanced. The brown sugar doesn’t make the kielbasa sweet on its own; it plays with the salt and smoke, helping to coax a beautiful caramelized crust when you grill. If you’re curious about substitutions or tweaks, this is a forgiving base. You’ll notice the recipe is designed for a precise grind and chilly handling—key steps that ensure the texture remains cohesive rather than crumbly. The use of ice water and proper chilling times matters as much as the spices themselves, and that’s where the magic happens.
Making homemade kielbasa isn’t a race; it’s a thoughtful process that rewards patience and attention to detail. Here are some practical tips to help you achieve restaurant-quality results at home:
Tip: If you’re new to sausage making, consider starting with a smaller batch to dial in your grinder settings and stuffing technique. The learning curve is finite, and once you’ve got it, you’ll find yourself layering flavors and experimenting with spices with ease. For those who love to meal-prep, this is a wonderful recipe to freeze in portions for a quick, savory dinner later in the week. And if you’re ever unsure about technique, a quick visual search or video guide can be a great companion to this written recipe.
When the kielbasa is grilled or pan-fried to a deep, inviting brown, the aroma alone is enough to make mouths water. Here are serving ideas that showcase the kielbasa’s versatility and complement its earthy, smoky profile.
If you’re inspired to experiment, try a small batch with a hint of fennel or coriander for a different aromatic profile. And if you’re curious how this recipe can evolve, check out other ideas in the same category and imagine your own combinations. When you’re ready to explore more of your culinary path, head to create and start crafting your own recipes.
Q: How long does the kielbasa last in the fridge or freezer?
A: Freshly cooked beef kielbasa will keep for 3–4 days in the fridge when stored in an airtight container. For longer storage, freeze properly wrapped portions; they’ll keep well for up to 2–3 months. Defrost in the fridge overnight before reheating.
Q: Can I make this ahead or in larger batches?
A: Absolutely. You can prepare the mix and stuff the casings a day in advance, then refrigerate and cook when ready. If you’re planning to freeze, I recommend partially cooking first, then freezing the sausages. This helps them reheat evenly and prevents overcooking when you reheat later.
Q: Are substitutions okay if I don’t have all the ingredients?
A: Substitutions can work, though they’ll alter the flavor profile. If you’re avoiding sugar, omit or reduce the brown sugar slightly and compensate with extra garlic or paprika for depth. You can use pork or turkey for the meat, but the texture and fat content will shift—pork shoulder can be a good alternative, while turkey will yield a leaner sausage that may need a touch more fat or moisture. If you’d like to experiment with casings, you can also make sausage patties without casing; the binding will be looser, but the seasoning remains delicious.
Q: How flexible is the spice level?
A: This recipe leans toward balanced spice—enough to notice without overwhelming the beef. If you prefer more heat, you can add a pinch of cayenne or a few red pepper flakes, but I recommend incremental additions and tasting a small patty before stuffing the entire batch.
Q: What’s the best way to test doneness?
A: Grilled or pan-seared kielbasa is done when the internal temperature reaches 160°F (71°C) and the exterior is deeply browned with a crisp crust. Let the sausages rest for a few minutes after cooking to redistribute the juices before slicing and serving.
Feeling ready to roll up your sleeves? Gather your ingredients, follow the steps, and savor the process as your kitchen fills with aroma and anticipation. And if you loved this approach to homemade beef kielbasa, there are plenty more recipes and variations to explore in the same Delicious homemade collection. When you’re ready to plot your next culinary adventure, visit create and start designing your own kitchen-tested masterpieces.
Discover similar recipes you'll love