Introduction
There’s something about a supper that feels like a warm hug from the kitchen. Maybe it’s the way butter pools in a pan, or how garlic sighs into the air with a sweetness that only a slow caramel can coax forth. Butter‑Basted Chicken with Caramelized Garlic‑Onion Sauce and Runny Egg is one of those dishes for me—a 40‑minute revelation that tastes like a celebration without the fuss. The first time I plated it, I watched the yolk break over the glossy onion sauce and thought, yes, this is dinner’s version of a first date: full of possibility, surprisingly simple, and absolutely worth showing off to whoever wanders into the kitchen.
In this post, I’m taking you through the way I navigate this recipe from start to finish—the prep that sets up for a perfect sear, the gentle caramelization that builds a deep, honeyed-sweet base, and the final flourish that turns a weeknight into something you’ll crave again and again. And if you’re a fan of bold, comforting flavors that don’t require a culinary degree, you’re in the right place. This dish rests squarely in the Delicious homemade category, a label I’m proud to wear whenever I serve up something that feels like it came from a home kitchen but tastes like it came from a chef’s notebook.
We start with four generous boneless skinless chicken breasts—patted dry so they form that svelte, golden crust instead of steaming in a pool of moisture. The aromatics—garlic and yellow onion—are sliced and smashed down the middle to coax out every layer of sweetness, which is then amplified by a quick deglaze and a single, luxurious pan sauce. A quick sear, a lively butter basting, and a memory-worthy runny egg perched on top transform this from a dinner option into your new weeknight ritual. It’s fast, it’s indulgent, and it leaves you with a kitchen smelling like Sunday and tasting like a quiet kitchen victory.
Ingredients Benefits
Let’s talk about why each component is there, beyond just “to taste good.” Understanding the why helps you trust the process when you’re cooking this on a busy weeknight or when you want to riff it with whatever you have in the pantry.
- Chicken breasts (4 pieces, about 680 g / 24 oz total) provide a lean canvas for flavor. They’re mild enough to accept the smoke of smoked paprika and the herbaceous lift of dried thyme. The recipe’s success hinges on an even thickness so you don’t end up with overcooked edges and underdone centers. If you have uneven pieces, a quick bash between plastic wrap guarantees a uniform 1/2 inch (12 mm) thickness. This is where the hack of kitchen science meets the comfort of a plate‑licking finish.
- Garlic brings a perfume that softens and sweetens as it cooks. I prefer smashing six cloves and reserving two whole, lightly crushed cloves to tuck into the pan for a gentle perfume that settles into the sauce. The garlic’s aroma is the recipe’s emotional center—the moment you know dinner is coming together.
- Yellow onion is sliced thin so it caramelizes evenly and deeply. The goal is a color that’s deeply golden and a taste that leans sweet with a savory backbone. Onions release sugars that, when coaxed with a low, steady heat, become the sauce’s first note before the garlic enters the stage.
- Eggs are the finishing flourish. A sunny‑side‑up egg with a runny yolk creates a second sauce as you cut into it, the yolk merging with the caramelized onion to create a velvety, rich finish. It’s a luxurious touch that remains surprisingly accessible—no poaching skill required, just a little technique in a nonstick pan.
- Olive oil and butter form a dual foundation. Olive oil handles the high‑heat sear, while butter contributes depth and a nutty aroma when you baste. The butter also helps emulsify the sauce as you finish it, bringing all the flavors into one glossy, silky glaze.
- Salt, black pepper, smoked paprika, and dried thyme work in concert to wake up the chicken without overpowering it. The paprika adds a smoky warmth, the thyme adds an herbal lift, and the salt guides every other flavor to its place on the palate.
- Water is used to deglaze and loosen the fond (the browned bits) from the pan. It dissolves the sugars and reintroduces them into the sauce, creating a glossy, satin finish that clings to the chicken and the egg alike.
As you can see, every ingredient isn’t there by accident. Each choice builds toward a sauce that’s richly flavored, a chicken that stays juicy, and an egg that gleams like a tiny, edible centerpiece. If you’re curious about where to start with any one ingredient, you’ll find deeper dives linked throughout this post to help you make the most of your pantry.
Expert Tips
These notes are the little adjustments I’ve learned through countless dinners that make or break a dish like this. Treat them as a toolkit you can lean into when you’re cooking for friends, family, or just your own hungry self after a long day.
- Dry, then rest briefly. Pat the chicken dry with paper towels before seasoning. A dry surface sears faster and more evenly, forming that desirable Maillard crust. After seasoning, let the chicken rest at room temperature for 8–10 minutes. This helps the seasoning permeate and brings the meat closer to the target cooking temperature, which means more evenness in every bite.
- Caramelize low and slow. The onions deserve time. Cook them in a skillet with a little oil and butter over medium heat for 10–12 minutes until deeply golden. The sugars caramelize, creating a base that’s both sweet and savory. Don’t rush this part; it’s the backbone of the dish’s depth.
- Garlic enters for aroma, not burn. Push the onions to the side, add the remaining oil, and sauté the garlic for 1–2 minutes until fragrant and lightly browned. Garlic burns easily, so watch it carefully. Then stir the garlic into the onions and keep the heat gentle while you work on the chicken.
- Sear with purpose. Use a second large skillet (cast‑iron if you’ve got it) hot enough that it sizzles as soon as the chicken hits the pan. Don’t overcrowd. A deep, golden crust locks in juices and provides a textural contrast to the onion sauce.
- Butter‑baste for moisture and aroma. After flipping the chicken, add 1 tablespoon butter and the reserved crushed garlic to the pan. Tilt the pan and spoon the butter over the chicken for 2–3 minutes. This technique keeps the surface moist and infuses a nutty aroma that permeates the meat as it finishes cooking. Aim for an internal temperature of 155–160°F (68–71°C) in the thickest part; carryover heat will bring it to a safe, juicy finish.
- Make the pan sauce in your sleep. While the chicken rests, deglaze the garlic‑onion pan with 1/4 cup water and scrape up the fond. A quick simmer reduces slightly, then whisk in the rested butter. If you like extra richness, scrape the butter from the chicken pan into the sauce for a deeper, more cohesive glaze.
- Egg timing is everything. Fry the eggs in a little butter over medium‑low heat. A 3–4 minute window yields whites that are set and yolks that stay runny. If you need the whites a touch firmer, cover for the last minute. The runny yolk is your golden rain of silk over the onion sauce; the combination is what elevates this dish from good to irresistible.
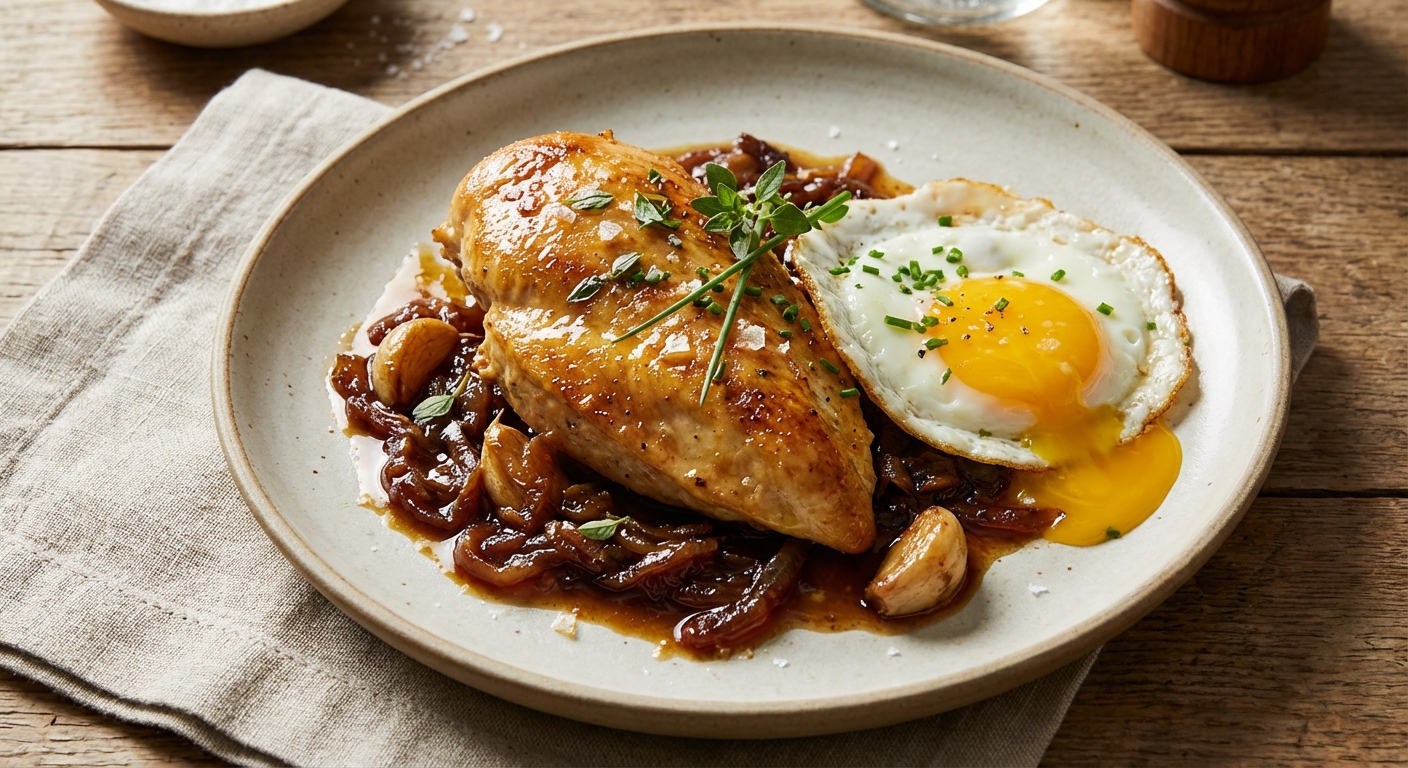
- Plate with intention. Create a bed of the caramelized garlic‑onion sauce, lay the butter‑basted chicken on top, and crown with the fried egg. Drizzle additional warm sauce and pan juices over the egg and chicken. A crack of black pepper is all the finishing touch needed to wake the flavors.
- Make it your own. If you don’t have thyme, swap in dried oregano or a pinch of Italian seasoning. If you’re out of smoked paprika, use regular paprika and a pinch of cumin for a warmer, earthier note. The technique is forgiving, and the flavor payoff remains robust.
Serving Suggestions
Plating is a small stage with a big impact. I like to think of this dish as a complete narrative on one plate, so I keep the sides straightforward to let the star ingredients shine. A few ideas that complement the buttery, garlicky glaze and the runny egg:
- Crusty bread for sopping up the extra sauce; I often reach for a loaf with a rustic crust that crackles when torn. If you want to lean into the total indulgence vibe, toast garlic butter bread and use it as a dipping vehicle for all the warm yolk and caramelized onion goodness. (If you’re stocking up on bakery items, you can explore other bready keepsakes within the same culinary family—like how bread becomes a sauce’s best friend.)
- Roasted vegetables—think carrots, Brussels sprouts, or zucchini—are a bright counterpoint to the richness of the sauce. A quick roast with olive oil, salt, and pepper complements the dish without stealing the show. If you’re reading this in the spring, a quick sauté of asparagus or peas adds a fresh, crisp finish.
- A simple green salad with a lemon vinaigrette helps balance the richness. The acidity brightens every bite and makes the dish feel lighter on the palate.
- Pairing the plate with a crisp white wine or a light beer can elevate the overall experience. If you’re serving this to a crowd with mixed preferences, a sparkling wine or a dry Riesling mirrors the butter’s richness without overwhelming the palate.
- Leftovers are surprisingly versatile. Reheat gently in a skillet with a splash of water to loosen the sauce, then spoon over warmened shredded chicken or toss with a quick “fried rice” style mix for a quick lunch. The onion‑garlic base holds up well so you won’t lose the character of the sauce.
If you’re chasing more kitchen confidence with similar flavor profiles, this dish sits comfortably in the same neighborhood as other rich, comforting plates in the Delicious homemade collection. And if you’re ever unsure about where a specific ingredient could take you in future recipes, I’m always happy to point you toward a dedicated resource: garlic, onion, or any of the pantry staples you see above.
Before you dive into cooking, remember: the goal is to feel good in the kitchen. You’re not just following steps—you’re shaping memories, one sizzling pan at a time. If this dish sparks a craving for more adventures in your own kitchen, I’d love to hear about it. And if you’re ready to experiment and create your own recipes, the next step is to explore your own culinary voice at create.
FAQ
Here are a few quick answers to common questions that come up when I’m teaching this recipe to friends and readers. If you have a question not listed here, drop it in the comments and I’ll weigh in with tips from my kitchen floor to yours.
- How long does this keep? Once cooled, the chicken and sauce will keep well in the refrigerator for up to 3 days. Reheat gently in a skillet with a splash of water or broth to loosen the sauce. The runny egg is best enjoyed fresh, so consider cooking the egg to order when serving leftovers, or keep the egg separate and add a fresh fried egg on top when reheating for best texture.
- Can I make this ahead? You can caramelize the onions and garlic in advance and store them in a sealed container. Reheat gently, then cook the chicken as directed. The egg is best cooked fresh, but you can fry a batch of eggs and keep them warm in a low oven while the chicken finishes rest and the sauce finishes.
- Could I use chicken thighs? Absolutely. Chicken thighs offer more forgiving juicy texture and a deeper flavor. You may need a few extra minutes on the stove to reach a safe internal temperature, and you may want to adjust the salt slightly since thighs can carry more moisture.
- substitutions for spices? If you’re missing smoked paprika, you can use regular paprika with a light pinch of cumin for a similar warmth. If you’re avoiding thyme, dried oregano or a pinch of herbes de Provence can work well, though it will shift the flavor profile slightly.
Whether you’re cooking for one or feeding a small family, Butter‑Basted Chicken with Caramelized Garlic‑Onion Sauce and Runny Egg is a reminder that great flavor can come from simple, thoughtful technique. It’s a dish that invites you to lean into the butter, to give the onion time to surrender its sugars, and to trust the yolk’s glorious, golden finish as the finale. It’s comfort with a bit of theater, and it’s yours to own in just a few dozen minutes of focused kitchen joy.
Ready to try making your own recipes and find your signature twists? Start your next culinary adventure at create and let your kitchen be the studio where you craft memories as delicious as this plate.